Suggested Technique for Creating a Swept Blend to a Point
Procedure
-
Create a part named Cane and create Default Datum planes. Rename
the datum planes to TOP, FRONT and SIDE.
-
Create a Protrusion by selecting Advanced and Swept Blend. Choose Sketch
Spine, Sketch Sec and No Opt Tan from the SPINE menu. Choose FRONT as the
sketching plane and TOP as the Top reference for sketching.
-
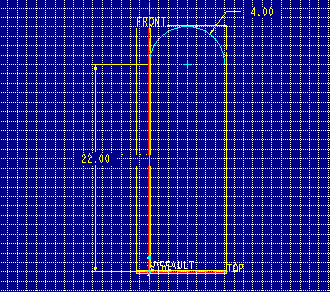
Sketch a section as shown in Figure 1 for the trajectory. After regenerationing the
trajectory, make sure that the start point is at the bottom of the cane (use Sec Tools,
Start Pnt).

Figure 1
-
After a succesful regeneration of the trajectory sketch, choose Done from the Sketcher menu.
When prompted, sketch
sections at any vertices and any spline control points along the trajectory. The system
will highlight one vertex in the trajectory and prompt for a section. Choose Accept and
enter a Z rotation angle of [0] for section 1.
++Note: A section is required at the beginning and at the
end of the trajectory. A section can be put at all other endpoints
and spline points.
-
Sketch the section
shown in Figure 2. Notice the small sketcher coordinate system at the bottom of the cane.

Figure 2
-
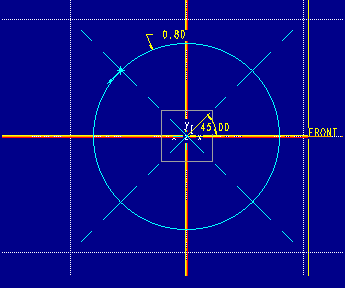
After the sketch is completed, the system will prompt if a Z axis
rotation is desired for the second sketch. Enter[0]. Sketch the four arcs with radius .80
shown in Figure 3. Change to the default view to clarify the sketching
plane location. Make sure that the start point is correct. Use Sec Tools, Start Pnt to
change the start point location if necessary.

Figure 3
-
When the second sketch is completed, go on to the third sketch. Enter a Z axis
rotation of [0], and sketch a single point at the origin of the new coordinate system.
-
After choosing Done, choose Sharp as the cap type.
-
To change to a smooth cap type, Redefine the protrusion's third section. Keep the
point there and choose Done. Choose Smooth to make a smooth cap. The resulting feature is shown in Figure 4.

Figure 4
Back to Pro/ENGINEER technical information
